REVIEW · YOGYAKARTA
Batik Master Class with Full Process
Book on Viator →Operated by Alga Lova Tour · Bookable on Viator
Batik starts with a line of wax. This Yogyakarta class turns that line into a take-home souvenir, right near Prambanan. I like that the instruction is hands-on from a master batik maker, not a quick demo.
I also like the pacing: you work through wax tracing and dyeing while enjoying coffee, tea, and local snacks, then you can take your piece away once it’s finished. The main thing to consider is that batik takes real time and precision, so if you hate slow, careful work, this may feel a bit patient-artist-y.
In This Review
- Key things to know before you go
- Prambanan to Batik: why this pairing makes sense
- The Full Batik Process you’ll actually do
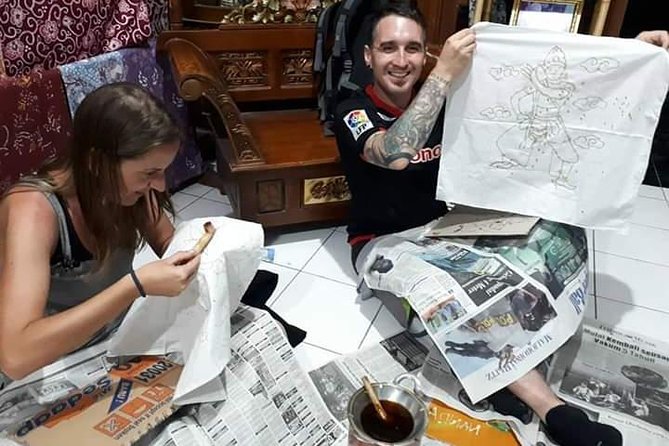
- 1) Start with a pattern
- 2) Outline with wax using the canting
- 3) Dye in sequence to reveal colors
- 4) Drying and finishing steps
- What makes the instruction work (and why people love it)
- What you take home: handkerchief size vs tote bag
- Snacks, coffee, and a calmer way to learn
- Location and timing: making it fit your Prambanan day
- Price and value: what $19.50 gets you
- Who should book this batik master class
- Practical tips so your souvenir travels well
- Should you book this batik master class near Prambanan?
- FAQ
- Where does the experience start and end?
- How long does the batik class take?
- How much does it cost?
- How many people are in the group?
- What size batik souvenir will I make?
- Does the class include food and drinks?
- What temple stops are included?
- Is there a mobile ticket?
- Is there a fitness requirement?
- What if the weather is bad?
Key things to know before you go

- Near Prambanan Temples: it’s designed as an easy add-on to a temple day.
- Canting + wax sequence: you’ll trace a pattern, outline with melted wax, then dye in steps so colors show up cleanly.
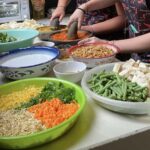
- Snacks and drinks while you work: coffee and tea come with local bites to keep you going.
- Small craft output: you’ll create a handkerchief-size piece, with an option for a tote bag for extra cost.
- A calm workshop setting: the vibe is more focused than rushed, with patient teaching.
Prambanan to Batik: why this pairing makes sense
Yogyakarta batik has a very specific look because of how it’s made. Traditional batik uses wax as a resist: where the wax goes, dye doesn’t. That wax-and-dye logic is exactly why making batik yourself feels different from just painting. You’re not only decorating fabric. You’re controlling which parts will accept color.
This experience is built for people who are already planning a Prambanan day. You get temple time first, then shift into a quieter workshop that’s close enough to feel like it belongs to the same outing. If you’re staying around the Prambanan area, it tends to feel like a short hop rather than a full new adventure with transport headaches.
There are two temple stops included: the Prambanan Temples and Sojiwan Temple. That mix helps you avoid a one-note day. You go from big visual scale at Prambanan to a smaller, more “slow look” temple moment at Sojiwan before you sit down with tools and make something with your own hands.
You can also read our reviews of more tours and experiences in Yogyakarta
The Full Batik Process you’ll actually do
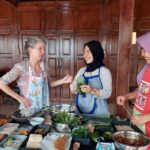
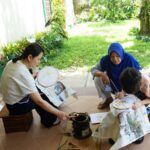
The workshop begins with an intro to batik and the tools you’ll use. Expect to learn how the wax resist works, what the canting does, and how to keep your pattern lines neat enough that dye behaves the way you want.
Here’s the core flow you’ll follow:
1) Start with a pattern
You trace a pattern at the start. This matters more than it sounds. Batik isn’t only about artistic taste. It’s also about where dye is allowed to reach the fabric. Your pattern placement becomes the roadmap for everything that follows.
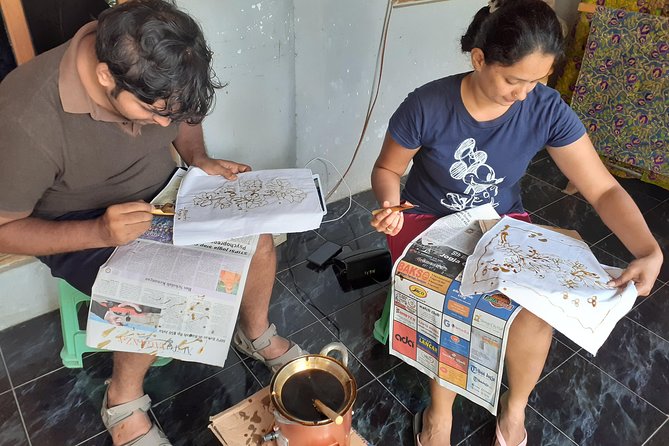
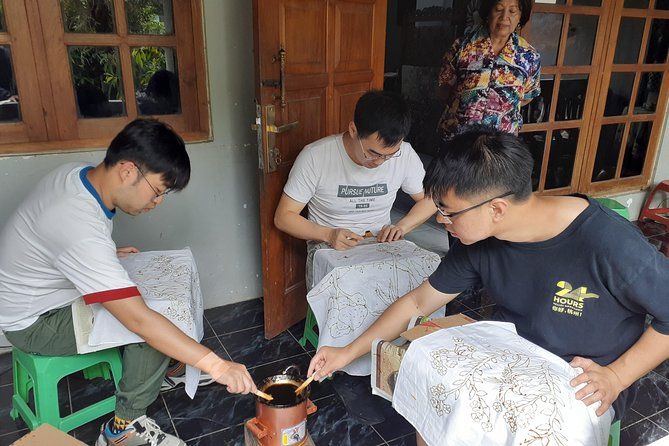
2) Outline with wax using the canting
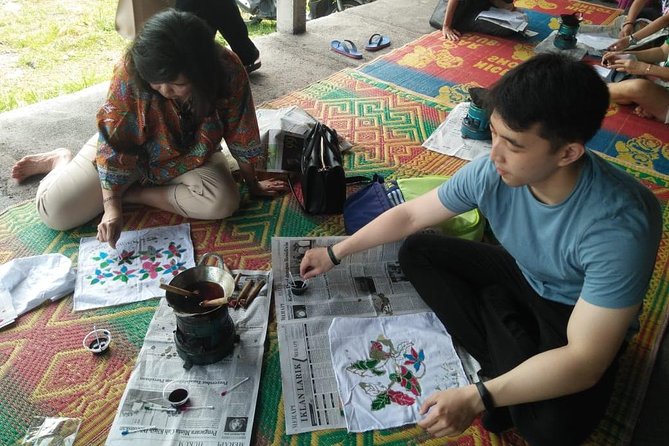
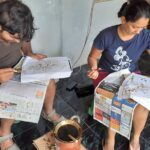
Then comes the signature part: you outline and fill your design using melted wax through the traditional canting tool. This is the moment where the craft becomes technical. If your lines are too thick, thin, or uneven, you may get dye leaks or less crisp edges. The good news: you’re not expected to start perfect. The class is set up for first-timers who want to learn muscle control.
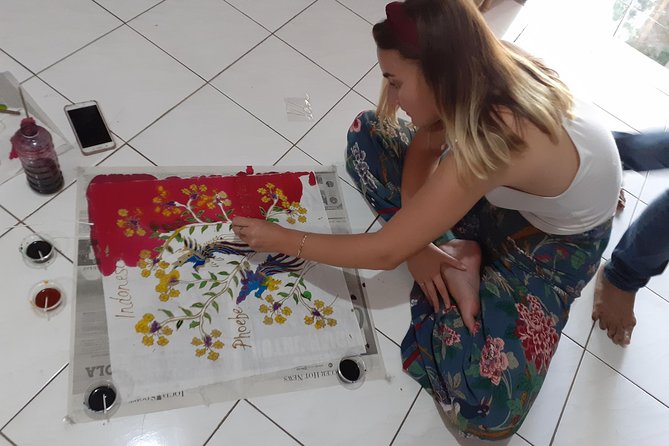
3) Dye in sequence to reveal colors
Next you dye. Batik color doesn’t happen all at once. It happens in sequence, which is what creates the layered look. Wax blocks dye during each stage, so later colors only show where the wax has been removed or where you’ve left areas protected.


4) Drying and finishing steps
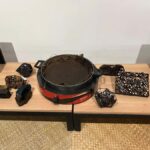
After dyeing, the fabric needs time to dry. In the finishing steps, the cloth goes through soaking in a chemical solution and then in water to complete the process. This is the part you won’t do yourself at home, but it’s included so your piece can be taken away as a finished souvenir.
One practical note from real experience: your item may still be a bit wet when you leave, so it’s smart to plan for careful handling in your bag and maybe use paper underneath to catch any moisture.
What makes the instruction work (and why people love it)
This class runs with a master batik maker guiding the session. What you’re paying for is not just access to materials. It’s coaching: how to hold the canting, how to apply wax with consistent pressure, and how to approach dye stages without rushing.
A few things that stand out in the way the class is described and run:
- The teaching focuses on clear technique rather than pressuring you to copy perfectly.
- You get encouragement even if your first lines look shaky. The logic is simple: batik is still art even when your control is still learning.
- If you’re traveling with family, the workshop’s step-by-step structure tends to work well because kids and adults can both participate. The “coloring” stage is usually the fun part people look forward to.
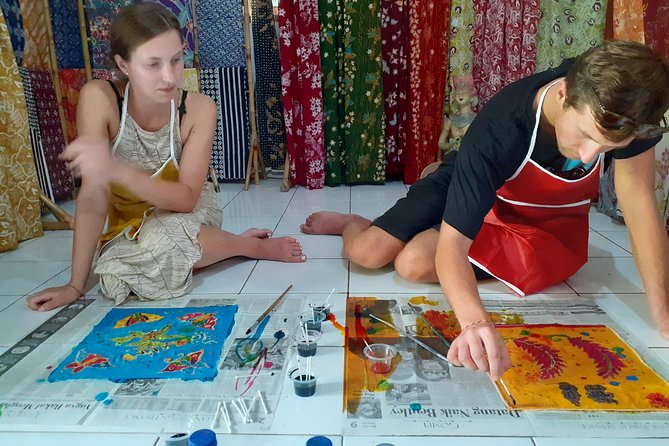
What you take home: handkerchief size vs tote bag
Your final piece is made at handkerchief size by default. If you want a larger item, there’s an option for a tote bag with a bit extra cost. This choice affects what you’ll spend your attention on: a bigger surface can feel more expressive, but it also means more chance for wax and dye decisions to matter.
Either way, the key value is that you leave with something real. The process ends with your piece being ready enough to take away as a souvenir, rather than something you have to mail later.
Practical tip: because batik involves wax and dye stages, your item may benefit from careful drying after you get back. Keep it flat if possible and give it space to finish drying fully.
Snacks, coffee, and a calmer way to learn
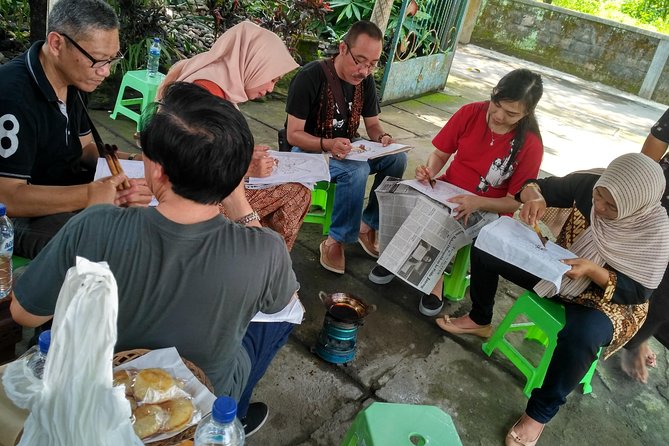
One of the nicest parts here is that you’re not sitting in silence doing crafts like a school assignment. You’ll nibble on authentic local snacks while working, with coffee and tea included. That small comfort matters because batik is hands-on and time-based. You’ll want to stay alert and patient while your wax and dye stages take their turns.
Also, the workshop is described as a peaceful place close to Prambanan, which helps you feel less like you’re running between stops and more like you’re settling in. Even if your day includes temples, this workshop gives you a different rhythm.
Location and timing: making it fit your Prambanan day
The session runs about 3 hours (approx.). That makes it a good match for people who want a meaningful activity without losing an entire afternoon.
Because it’s near Prambanan, you can plan it as either:
- the next step after visiting Prambanan Temples, or
- a creative break in the middle of a sightseeing day that already includes nearby temples like Sojiwan.
Meeting point is Pasar Prambanan (Ps. Prambanan), Jl. Merpati No.60, Klurak Baru, Bokoharjo, Kec. Prambanan, Kabupaten Sleman, Daerah Istimewa Yogyakarta 55572, Indonesia. The activity ends back at the same meeting point.
If you’re building a day around Prambanan, this “round-trip to the same place” matters. You don’t need to solve a separate pickup puzzle after you finish making something.
Price and value: what $19.50 gets you
At $19.50 per person, this is one of the more approachable craft activities near Prambanan. The best value is that you’re not just watching batik. You’re making it through the key stages: pattern tracing, wax outlining with canting, dyeing, and the finishing steps that let you take the result home.
For context, batik supplies, instruction time, and the finishing process all add up. A class like this can easily become expensive when it’s only a brief stop. Here, the duration is about 3 hours, which gives you real working time rather than a quick souvenir photo moment.
If you want the tote bag option, you should expect that to cost a bit extra, but even then, it still feels like a sensible upgrade if you’re hoping for a more useful item than a handkerchief.
Booking is typically done about 10 days in advance on average, which suggests it’s popular during the periods when people are doing temple days and arts-and-crafts add-ons. If your dates line up with peak travel, plan ahead.
Who should book this batik master class
This experience fits best if you:
- want a hands-on Yogyakarta souvenir with real craft steps behind it
- like the idea of learning a traditional technique using wax resist and canting
- want an activity that works for mixed ages thanks to the structured, guided process
- are already planning Prambanan Temples and want a calm, creative follow-up
It may be less ideal if you:
- want a fast activity with minimal sitting and waiting
- hate careful, repetitive hand movements
- expect a finished-looking item with no learning curve
In other words: go if you’re curious, patient, and willing to learn by doing.
Practical tips so your souvenir travels well
A few practical things that make life easier:
- Dress for dye and wax work. Even if you’re careful, batik is messy by nature.
- Plan for your item to be handled gently. If it’s still damp when you leave, keeping it flat and separated from other items helps.
- If you’re heading straight to dinner after, bring a bag you can keep it in without smearing or rubbing.
- Bring your curiosity, not your perfectionism. The workshop’s teaching style is built around learning, not just delivering a flawless final piece.
Also, because this experience is described as requiring good weather, keep your day flexible if skies look questionable.
Should you book this batik master class near Prambanan?
Yes, if you want an authentic Yogyakarta craft souvenir tied to traditional technique, not just a store-bought pattern. The combination of temple time (Prambanan plus Sojiwan), real batik steps (wax resist with canting and staged dyeing), and included snacks makes it a solid use of a few hours.
Book it especially if your priority is bringing home something you made with your own hands—and if you like the idea of learning at a relaxed pace in a workshop close to where you’re already sightseeing.
FAQ
Where does the experience start and end?
It starts at Pasar Prambanan (Ps. Prambanan), Jl. Merpati No.60, Klurak Baru, Bokoharjo, Kec. Prambanan, Kabupaten Sleman, Daerah Istimewa Yogyakarta 55572, Indonesia, and it ends back at the same meeting point.
How long does the batik class take?
The experience lasts about 3 hours (approx.).
How much does it cost?
The price is $19.50 per person.
How many people are in the group?
The workshop has a maximum of 30 travelers.
What size batik souvenir will I make?
You’ll make a handkerchief-size piece. There’s also an option to make a tote bag for an extra cost.
Does the class include food and drinks?
Yes. You’ll get local snacks plus coffee and tea during the workshop.
What temple stops are included?
The experience includes visits to the Prambanan Temples and Sojiwan Temple.
Is there a mobile ticket?
Yes, the experience includes a mobile ticket.
Is there a fitness requirement?
Travelers should have a moderate physical fitness level.
What if the weather is bad?
Good weather is required. If it’s canceled due to poor weather, you’ll be offered a different date or a full refund. You can also cancel for a full refund up to 24 hours in advance of the experience start time.