REVIEW · YOGYAKARTA
Yogyakarta: Jomblang Cave Tour
Book on GetYourGuide →Operated by Jogja Borobudur Tour & Travel · Bookable on GetYourGuide
Stepping into Jomblang Cave is less like sightseeing and more like earning your photo. The main payoff is that famous ray of light that cuts into the cave like it belongs in a storybook. You also get a real adventure day: a long descent, hours underground, and an out-and-back plan that keeps things moving.
I especially like two parts: the almost 60-meter rappel (yes, it’s that dramatic) and the guided experience with equipment, English support, and solid logistics. It’s a big physical day, but it’s run with a clear structure.
One drawback to plan for: there’s an extra ticket cost at the cave entrance (IDR500,000 per person, cash only), and the route inside includes slippery, muddy sections. If you don’t like wet feet and careful footing, you’ll want to prepare.
In This Review
- Key Things I’d Prioritize on This Tour
- Why Jomblang’s Heavenly Light Is the Real Reason to Go
- Getting There From Yogyakarta: Plan for Traffic, Not Just Distance
- What Gear and Footwear Mean in Jomblang Cave
- The 59-Meter Rappel: Controlled Adrenaline, Step by Step
- Reaching the Light: The 270-Meter Muddy Tunnel Walk
- Photography in Low Light: How to Get Better Cave Photos
- Lunch, Water, and What the Day Feels Like Overall
- After Jomblang: How to Use the Remaining Time
- Price and Value: What Your $30 Really Buys
- Who This Tour Fits Best
- Should You Book This Jomblang Cave Tour?
- FAQ
- FAQ
- How long is the Jomblang Cave tour?
- What does the tour price include?
- Is the cave entrance fee included in the $30 price?
- What should I wear and bring?
- Do I need my own camera or special camera equipment?
- Is pickup available from any accommodation in Yogyakarta?
- Is there an English-speaking guide?
- What happens inside the cave?
- What other attractions can I add after the cave?
Key Things I’d Prioritize on This Tour

- The 59m rappel: the moment that turns an ordinary day into a real cave adventure
- The 270m muddy tunnel walk: longer than you’d guess, and it rewards good footwear
- The 4 hours inside the cave: enough time to explore, not just pose for a quick shot
- A well-run English guide experience: helpful instruction and a calm pace underground
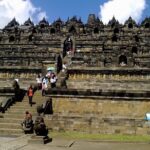
- A flexible add-on day plan: you can tack on Pindul Cave or Timang Beach after the cave
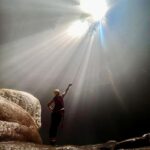
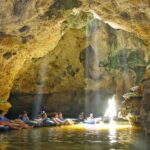
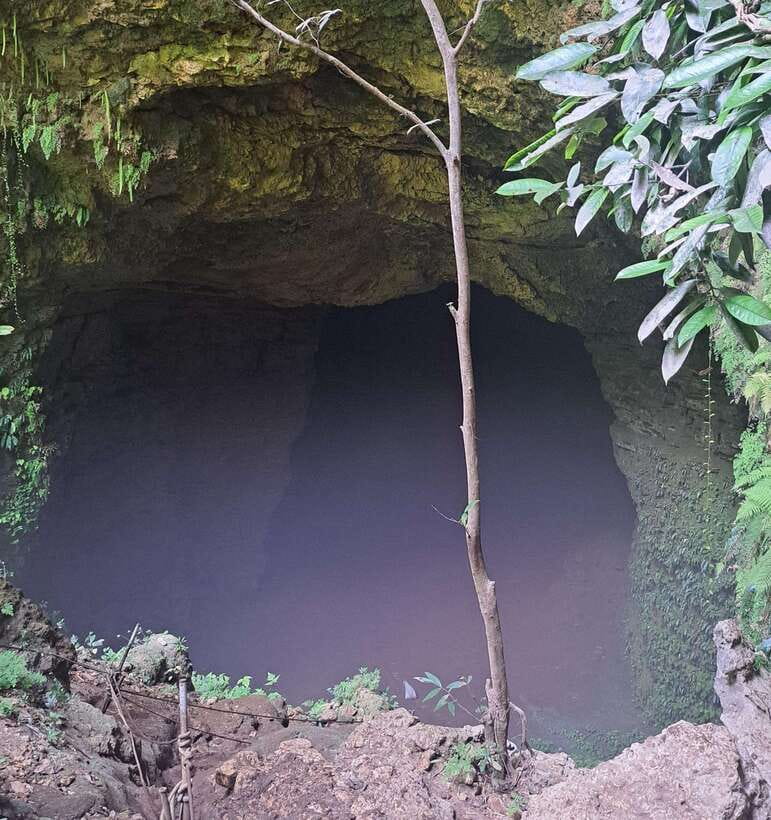
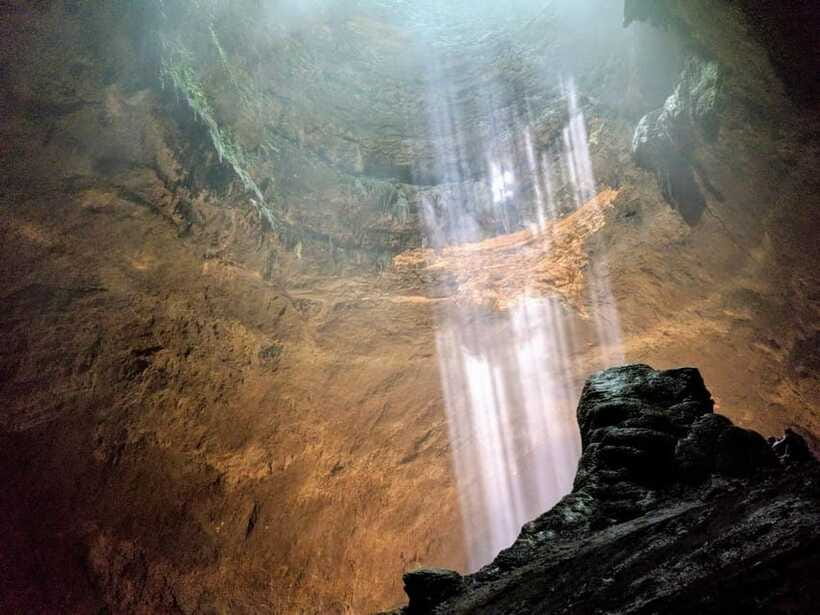
Why Jomblang’s Heavenly Light Is the Real Reason to Go
Jomblang Cave is known for one thing above all: a beam of light that appears inside the cave and spreads across the darkness. The effect is what makes people say it feels almost heavenly. And because it happens at a specific spot, you’re not just walking into any cave view—you’re moving toward a targeted moment.
I like that the tour is built around this payoff. You descend close to 59 meters, then walk through a tunnel to reach the viewing location where the light can hit. That structure matters. It turns “explore a cave” into “work your way to a specific spectacle,” and it’s the difference between a good photo and a memorable one.
The vibe underground also has a strange emotional contrast: you’re in a rough, physical environment (gear, slippery ground, muddy tunnels), but then—when you reach the right place—the light makes it feel calm and almost unreal. That’s the trade-off: effort up front, reward later.
You can also read our reviews of more tours and experiences in Yogyakarta.


Getting There From Yogyakarta: Plan for Traffic, Not Just Distance
This tour starts with pickup from your accommodation in Yogyakarta in the morning. Then you’ll travel for about two hours to reach Jomblang Cave. If you’ve ever driven in Java, you already know traffic can be chaotic. The driver’s job here isn’t just driving—it’s negotiating that reality so you arrive with enough time for the cave process.
I also like the human side of this part of the day. The drivers are often the first layer of comfort, and you’ll see it in how they communicate. For example, people have mentioned drivers like Arya texting relevant info in advance and staying available during the trip if questions pop up. Others, like Yoyokk and Solis, are described as friendly and chatty, sharing culture and local context along the drive.
For you, that means the ride doesn’t feel like wasted time. You’re likely to learn a bit about what you’re seeing on the way, and you’ll get practical tips about what to bring and what to expect.
What Gear and Footwear Mean in Jomblang Cave
The tour includes rappelling equipment, plus a guide and lunch. So you don’t need to source safety gear yourself. You do need to think about how you’ll manage footwear and temperature changes.
Here’s the practical stuff you should treat like non-negotiable:
- Wear slippers so changing shoes is easy.
- You can get boots if you need them, and the smallest size mentioned is 25.
- Bring a change of clothes (and extra clothes just in case).
Why so specific? Because the cave route involves a slippery, muddy tunnel. If you show up in shoes that are hard to remove or uncomfortable when wet, you’ll spend mental energy dealing with your feet instead of enjoying the adventure.
Also, it gets warm underground. Even though the tour includes water, it’s smart to bring a water bottle for inside. Warm cave air can sneak up on you, especially when you’re wearing gear and moving through damp areas.
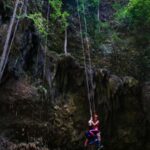
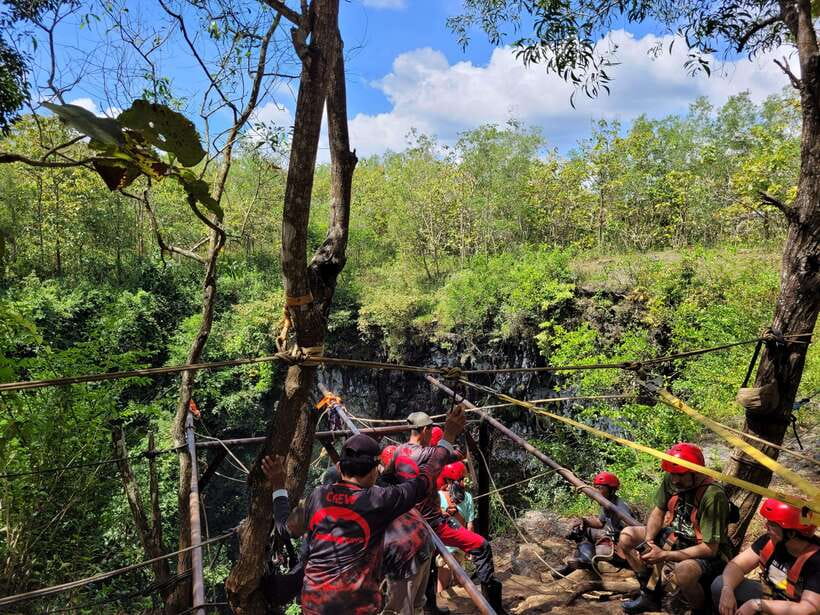
The 59-Meter Rappel: Controlled Adrenaline, Step by Step
The signature physical moment is the descent. You’ll rappel to the bottom of the cave—around 59 meters—and then spend about four hours exploring.
Even if you’re not a thrill-seeker, this part is worth respecting. A rappel is controlled, but you still feel height and motion. That’s why having rappelling equipment included is a big value. It’s one less logistics headache and one more safety layer.
Your guide and the cave team play an important role here. People have described cave staff as professional, helpful, and even funny while talking to them. That sort of demeanor matters when you’re about to do something technical. It reduces tension and helps you follow instructions calmly.
A practical tip: don’t rush your preparation. If you’ve got anything tight, bulky, or hard to secure, adjust it before you start the descent. Under cave conditions, small annoyances become big ones.
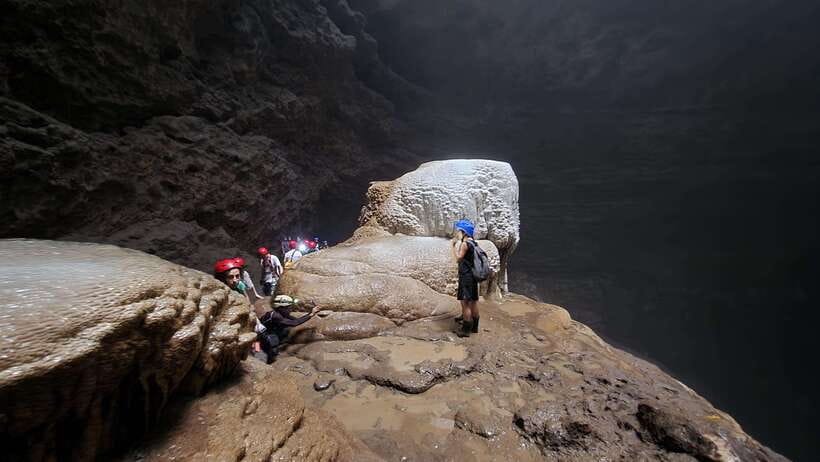
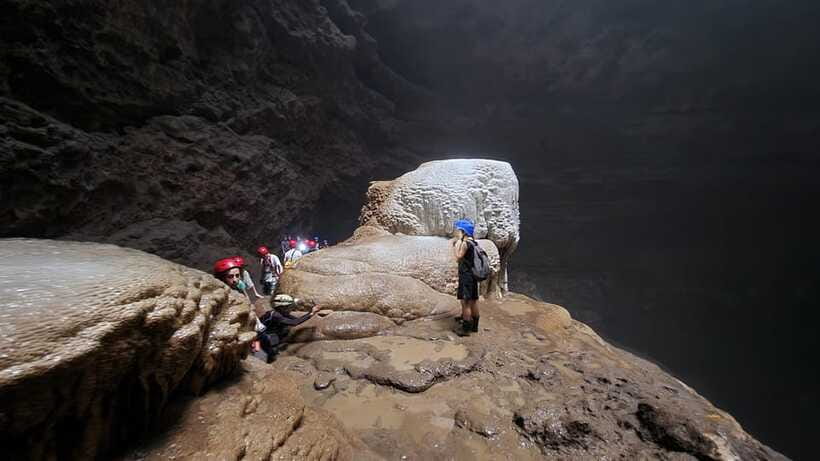
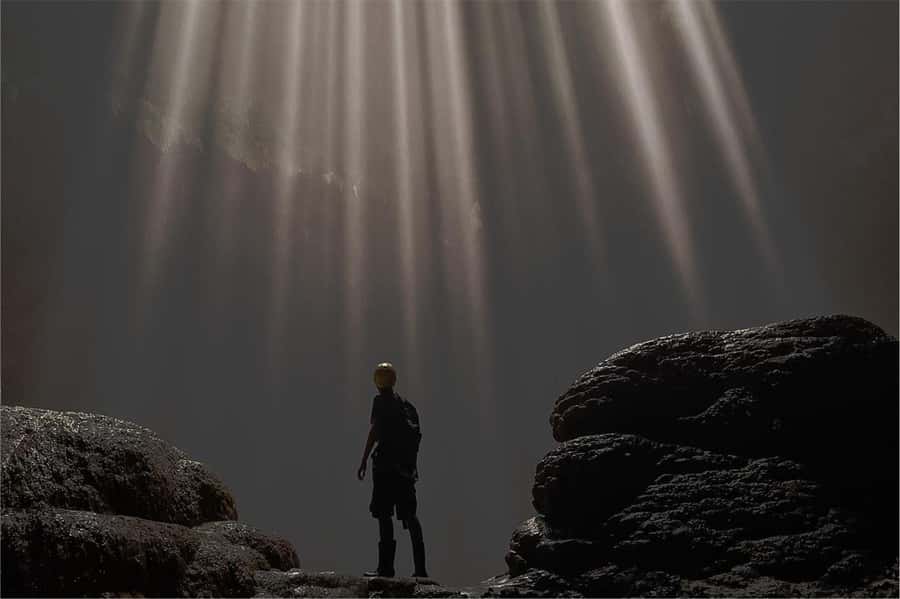
Reaching the Light: The 270-Meter Muddy Tunnel Walk
After the rappel, you’ll walk about 270 meters through a slippery muddy tunnel to the spot where the ray of light appears. This is where many first-timers underestimate the experience.
This isn’t a flat, dry hallway. You’ll be moving in damp conditions, and the footing can feel unreliable. That’s why slippers and easy-to-change footwear are recommended for the overall day flow, and why boot fit matters if they provide them for you.
Also, this segment is part of the reason the light feels so dramatic. You’re working your way to it. The light doesn’t greet you the second you arrive—it shows up after you’ve earned it with patience, careful steps, and some physical effort.
If you’re taking photos, this part also affects your timing. Your best shots are usually at the viewing spot where the light hits. So focus on getting there safely and with enough energy left to enjoy the moment.


Photography in Low Light: How to Get Better Cave Photos
Caves don’t forgive basic camera settings. The tour info specifically calls out that cameras that shoot in low light are best for photography. That’s good advice because the cave interior can be dark, and you’re trying to capture both the light beam effect and surrounding textures.
Here are practical photo tips that match what you’re dealing with:
- Use a camera mode suited to low light, or enable a low-light scene setting if you have one.
- If you’re using a phone, consider using portrait or night modes if your device offers them.
- Expect damp conditions and avoid swapping gear too often while you’re on the move.
Many people mention that guides take lots of photos for them. That’s useful if you prefer focusing on the experience rather than constantly asking strangers to take shots. Still, it helps to bring your own low-light capability so you’re not relying only on others.
If you want a “heavenly ray” image, be ready to hold your position at the right spot and wait a few moments. Cave light can be brief and location-dependent.
Lunch, Water, and What the Day Feels Like Overall

Lunch is included, and water is included. In a full-day outing, these details matter more than they seem. Once you’re underground, you’ll burn energy and your body will want steady fuel.
What the cave day often feels like is a mix of effort and waiting: rappel prep, descent, then time for exploration and moving between key points. The pace can be different from one operator to another, but the important thing is that you’re not rushing straight through. You get enough time to explore without turning the experience into a sprint.
One more practical note from the cave environment: if you run cold easily, bring a layer or at least pack extra clothes. You’re moving between bright morning air and warm, damp underground conditions. Even “warm cave” can feel different once you’ve been sweating in humid air.
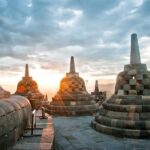
After Jomblang: How to Use the Remaining Time

Once you finish exploring and return from the cave, you can add another attraction before you’re dropped back at your hotel. Two options mentioned are Pindul Cave or Timang Beach.
This is a smart way to design your day. Jomblang is the core experience—intense and unique. Then you can choose a different type of scene as your contrast:
- Pindul Cave is another cave option (if you want to stay in geology mode).
- Timang Beach shifts you toward sea views and coastline energy.
If you like variety, this combo works well. If you’re tired after the rappel and tunnel walk, you can also treat the extra stop as optional and rest more comfortably on the ride back.
Price and Value: What Your $30 Really Buys
The tour price is listed at $30 per person for a 6-hour day. That price includes:
- Hotel pickup and drop-off
- Rappelling equipment
- Guide (English)
- Lunch
- Water
Then there’s the entrance fee at the cave itself: IDR500,000 per person, cash only.
So the fair way to think about value is this: the base tour price pays for the “machine” of the day—transport, safety equipment, guiding, and basic comforts (lunch, water). The cave entrance fee is a separate cost because the cave is run on private property.
Is it worth it? For you, the answer depends on two things:
- Can you handle the physical aspects: descent and slippery mud?
- Do you want the specific payoff of the light ray experience?
Given that the tour includes safety gear and guides for a real rappel, it can be good value compared to trying to piece together equipment and instruction yourself. Also, the transport quality is strongly praised, with 100% perfect scores mentioned. That matters because getting stuck in traffic at the wrong time can mess up a tight cave schedule.
Who This Tour Fits Best
This is best for you if you:
- Want a standout cave experience in Java with a real activity (not just walking).
- Don’t mind damp, muddy surfaces and the need to change clothing.
- Like guided help—especially English instruction and photo support.
It’s also a solid pick if you’re traveling as a couple or small group and want a driver who can keep things organized. Many drivers have been described as attentive and communicative, such as Arya sending prep info beforehand and Yuni delivering strong English guidance and cultural context while assisting with logistics.
If you’re very sensitive to slippery ground, or if rappelling sounds like your personal nightmare, you might feel uncomfortable. The tour isn’t built to be gentle.
Should You Book This Jomblang Cave Tour?
I’d book it if you want the heavenly ray moment plus a full adventure day that’s handled by people who know the routine. The biggest strengths—the rappel, the guided support, and the clear path to the light viewing spot—are exactly what make Jomblang special. The inclusion of equipment, lunch, and water also keeps the day from turning into a scavenger hunt.
I’d think twice if you hate mud and wet footing, or if you strongly dislike the idea of paying an extra IDR500,000 cash entrance fee after booking. And if you don’t like changing clothes mid-day, plan to keep your expectation realistic.
If you do book, pack smart: bring slippers, bring a change of clothes, and use a camera that handles low light. Arrive ready for effort, then let the light do the talking.
FAQ
FAQ
How long is the Jomblang Cave tour?
The duration is about 6 hours total, with around 4 hours spent exploring the cave.
What does the tour price include?
It includes hotel pickup and drop-off in Yogyakarta, rappelling equipment, an English guide, lunch, and water.
Is the cave entrance fee included in the $30 price?
No. You still need to pay the Jomblang Cave entrance fee of IDR500,000 per person, and it’s cash only.
What should I wear and bring?
Wear slippers so it’s easy to change shoes. Bring a change of clothes (and extra clothes in case you need to switch again). If you need boots, they can be provided with a smallest size of 25.
Do I need my own camera or special camera equipment?
A camera that shoots in low light is recommended for cave photography.
Is pickup available from any accommodation in Yogyakarta?
Yes. Pickup is available from any accommodation in Yogyakarta.
Is there an English-speaking guide?
Yes. The guide is listed as English.
What happens inside the cave?
You rappel down around 59 meters and then walk about 270 meters through a slippery muddy tunnel to the spot where the ray of light appears.
What other attractions can I add after the cave?
After the cave, you can add Pindul Cave or Timang Beach before being returned to your hotel.