REVIEW · YOGYAKARTA
Yogyakarta: 2-hour Batik Making Course with Souvenir
Book on GetYourGuide →Operated by Jogja Borobudur Tour & Travel · Bookable on GetYourGuide
Batik feels like a small magic trick in real life. At Batik Seno Gallery in Yogyakarta, you learn classic batik making step-by-step and leave with a real, finished piece you designed yourself. I especially like how the studio keeps the class hands-on (you’re working shoulder-to-shoulder with artists) and how English guidance makes the technique easy to follow, even if you’re a total beginner.
The main thing to plan for is mess and time. You’ll want to wear clothes you don’t mind getting stained, and the short sessions can feel more like the principles than the full, layered process you see on long courses.
In This Review
- Key points before you go
- Batik Seno Gallery: a practical base in Mantrijeron
- What happens during the batik making process (wax to finished fabric)
- Choosing your pattern: stencils, pre-drawn options, and your own twist
- The instructors: English instruction plus real patience
- 2 hours versus longer sessions in Yogyakarta: what changes in your results
- Drinks, drying time, and the stuff that keeps it relaxing
- Taking your batik home: what “finished” really means
- Price and value: why $8 can still feel like a “real” workshop
- Who should book this batik course, and who might skip it
- Should you book the Yogyakarta Batik Making course at Batik Seno Gallery?
- FAQ
- Do I need experience to take the batik making course?
- What language is the instruction?
- How long does the course take?
- Is the workshop indoors?
- What should I wear?
- What do I take home at the end?
Key points before you go
- Small group setup (up to 10 people) keeps the instructors close and helpful
- English-speaking batik guru instruction makes the steps clear, not mysterious
- You create your own design using stencils/pre-drawn options or your own drawing
- Wax, coloring, and removal steps teach what makes batik resist and resist again
- You leave with your own batik masterpiece, plus a shop to browse for authentic pieces
- Comfort extras like drinks (and sometimes light snacks) help during drying time
Batik Seno Gallery: a practical base in Mantrijeron
This workshop starts at Batik Seno Gallery on JL. Mantrijeron, MJ. III/801, Kec. Mantrijeron, Kota Yogyakarta. It’s indoors, which matters in Java when the weather shifts fast. The studio is set up like a working gallery and classroom, so you’re not just learning in a blank room—you’re learning in a place where batik is actually made and sold.
What I like about this base is the vibe: it’s calm and focused, not a hurried “tour stop.” The room layout helps you concentrate on your own piece while staff hover nearby to correct details. Past students also point out that there’s an attached shop where you can look at professionally made batik items before and after your session, which gives you context for how skilled work looks compared to your first try.
One small planning note: because you’re working with wax and dye, your outfit is basically “workwear.” Bring something you’re comfortable staining, and keep your expectations in check. You’re not wearing your favorite shirt to a fashion show here.
You can also read our reviews of more tours and experiences in Yogyakarta

What happens during the batik making process (wax to finished fabric)
The class is built around the core batik logic: wax acts like a barrier, and dye only hits areas you allow. You’ll follow a guided workflow, and you’ll be surprised how much of batik is slow, careful repetition instead of fast painting.
Here’s the flow you should expect at Batik Seno, based on the way the studio teaches and the steps described by students:
- Design transfer / stencil or drawing
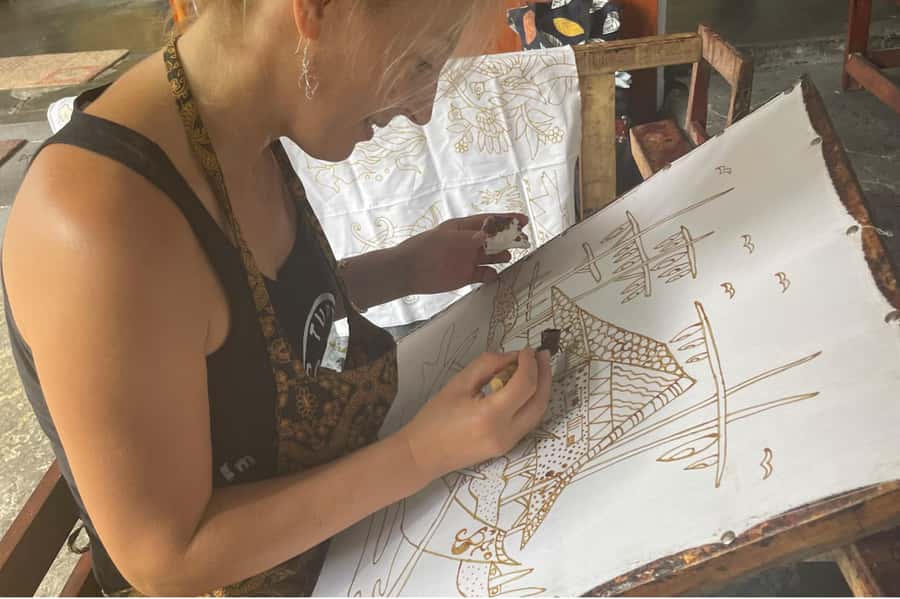
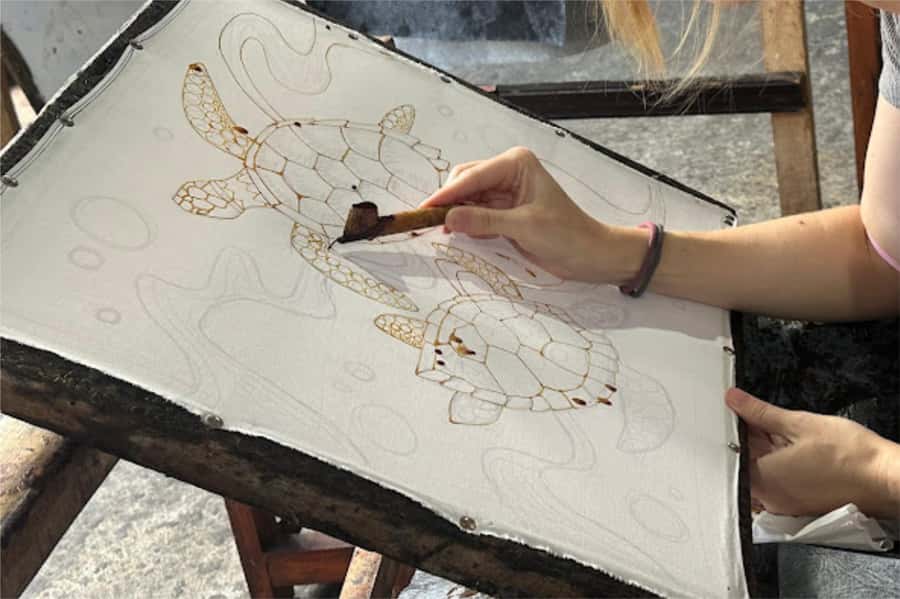
You choose a pattern option or a stencil, or you draw your own design on the cloth (the level of freedom depends on the course length). Staff guide you in line work with the wax tool (often described as a melted wax pen).
- Wax application (the resist lines)
This is the signature moment. You apply wax along your pattern. If you make a mistake, the team can often help fix it, but you should know that corrections can take extra time.
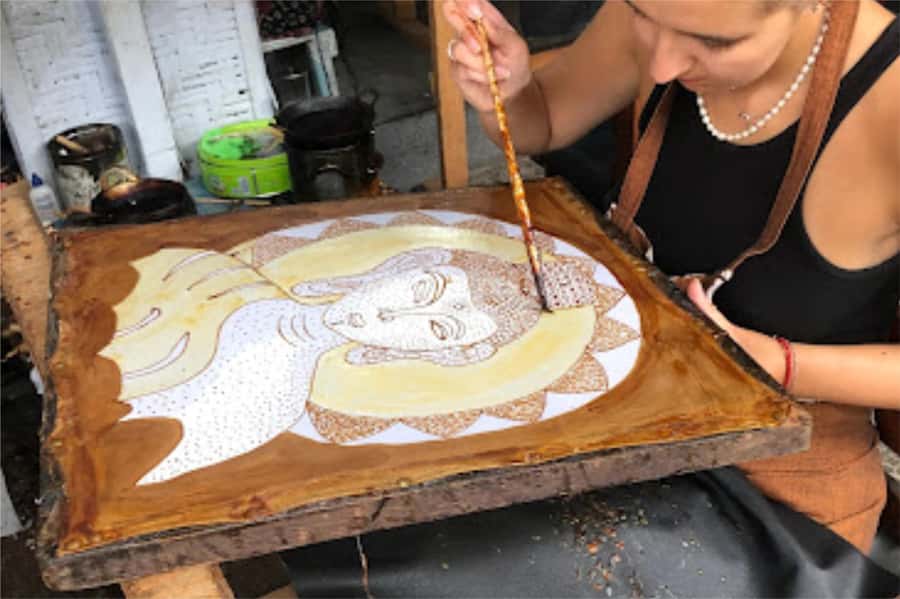
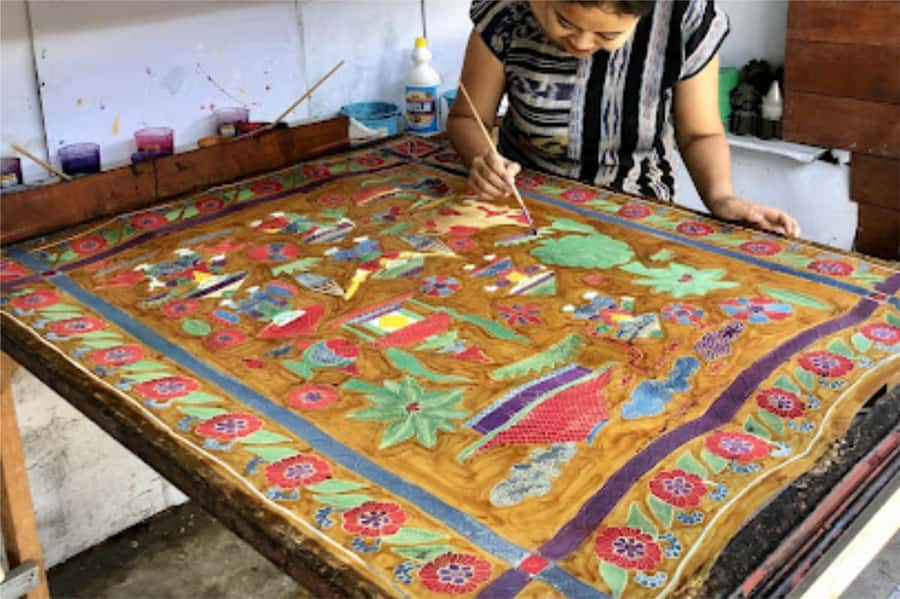
- Coloring and layering with dye
You paint in your chosen colors, following the resist structure. Students often mention help with selecting color choices and adjusting if the result doesn’t match the exact look you hoped for.
- Drying time and preparation for wax removal
Expect to wait while your fabric dries. This is where the studio’s drinks (and sometimes snacks) actually matter, because the waiting isn’t just awkward time—it’s part of getting a clean result.
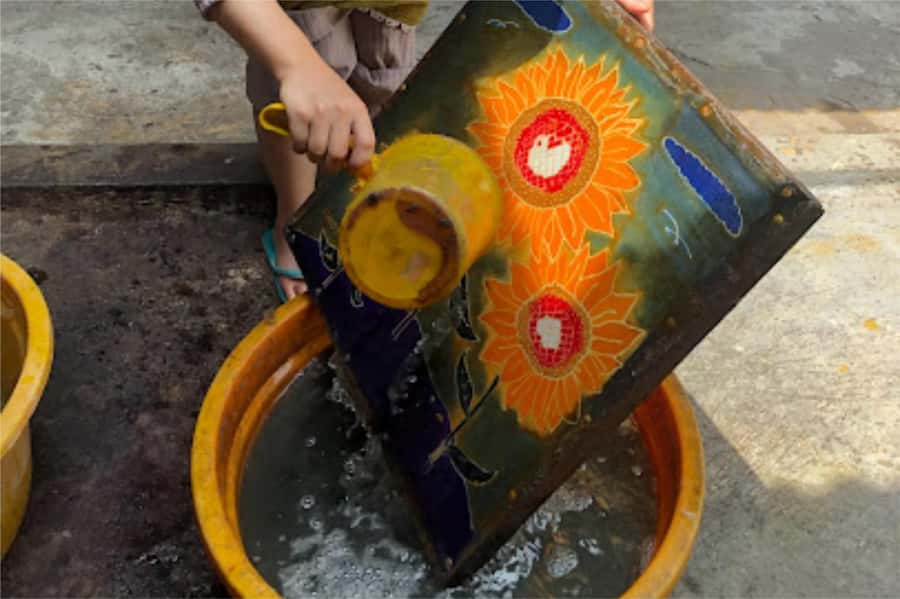
- Wax removal and final washing steps
One student describes a full sequence including wax removal and washing steps like acid washing. Even if your course is shorter, you’ll still complete enough of the process that you can take home a finished piece rather than a half-done project.
If you’re coming in thinking you’ll just “paint a cool souvenir,” recalibrate. Batik is closer to craftsmanship math: keep the wax clean, plan your color order, and let the dye do its thing. That’s exactly why it’s fun.
Choosing your pattern: stencils, pre-drawn options, and your own twist
A big reason this workshop gets such high marks is that you’re not locked into one pre-made design. You can usually select a pattern from options they provide, and you may be able to add your own elements depending on the course length.
Students mention a couple common routes:
- Pick from pre-drawn patterns or stencils, then follow the guided wax and dye steps.
- Draw your own image on the fabric for a more personal result (one student created a Komodo dragon using their own sketch).
Even when you choose a template, you still make real decisions. You’ll decide where lines go, which colors you use, and how bold or delicate your final look becomes. Staff guidance matters here because batik isn’t just about style—it’s about how lines and resist areas protect what’s underneath.
The studio also teaches the meaning behind common batik motifs. You might not walk out reciting a textbook, but you’ll come away with an appreciation for why certain patterns show up again and again. That makes your piece feel less like a generic craft souvenir and more like something with cultural intention behind it.
Oh, and instructors are patient. People mention that they take time, encourage you, and even offer advice on how to fix small mistakes instead of rushing you out the door.
The instructors: English instruction plus real patience

This is one of those rare activities where language support isn’t the hard part. The instructor is English-speaking, and the studio staff step in frequently. In fact, students specifically name helpers like Dayu and Kisa, who led sessions and explained the technique in a way that made it feel doable.
What that means for you: you won’t be stuck translating instructions with a hand gesture and a prayer. You can ask questions about color choice, wax line thickness, or how to recover when something goes a little wrong. One student even mentions trying to save a mistake and being guided through the fix.
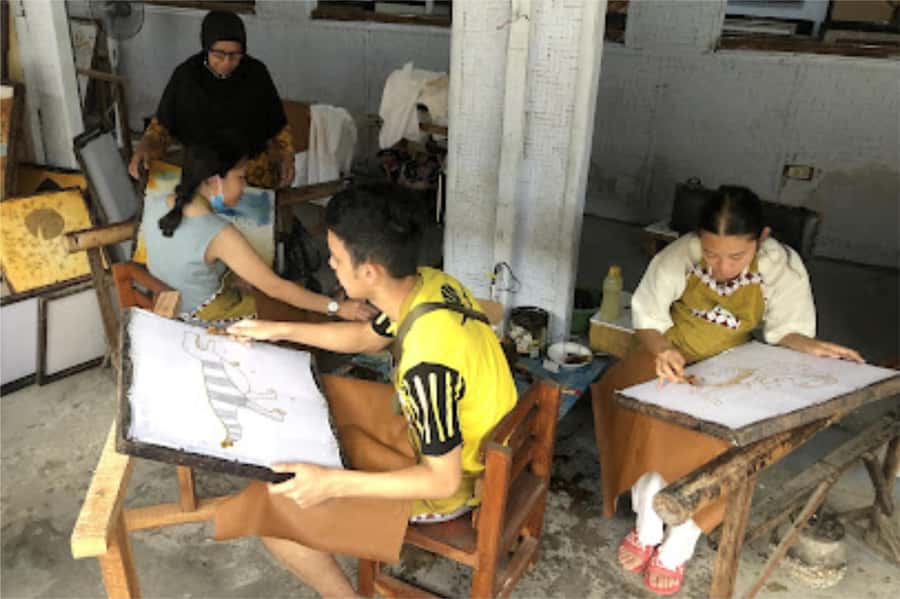
Also, the workshop runs as a small-team environment. Several helpers support the class, so you’re not waiting for one single person to notice you. That matters because batik is step-sensitive. One tiny wax slip at the wrong moment can change how a color behaves.
If you’re traveling with someone who’s not “an art person,” this setup still works. The staff makes it structured enough to feel safe, but free enough to feel creative.
2 hours versus longer sessions in Yogyakarta: what changes in your results

This is where you should choose carefully. The activity comes in different lengths, and the longer options give you more time for detail and process steps.
What you’ll notice:
- Short sessions (around 2 hours) are great for learning the principles and getting a completed souvenir quickly. Several students say the shorter format still feels unhurried, and it can be a strong pick if you have limited time in Yogyakarta.
- Longer sessions (up to about 5–6 hours in practice) let you work through more of the layering and development. One student upgraded to a longer session and felt it helped them understand the wax-and-color process in a deeper way.
Time can also stretch if you go for more detail. One student notes that a longer class ran closer to 6 hours for them, and that the main reasons were things like mistakes taking extra time, very detailed line work, and the size of the final piece.
My practical advice: if you’re the type who wants to do it properly (or you’re extra detail-oriented), pick longer. If you want a satisfying creative break without reworking your whole day, the 2–3 hour range often hits the sweet spot.


Drinks, drying time, and the stuff that keeps it relaxing
Batik has built-in pauses. Your fabric needs time to dry before the final steps. This is why the small comfort details make a difference.
In this workshop, you get drinks as part of the experience, and students mention things like coffee, tea, and water. Some also mention light snacks while waiting for wax or the finished piece to dry. That turns the waiting into a calm, social pause instead of an awkward sit-and-sweat moment.
The workshop atmosphere is described as peaceful and creative, with staff hovering and helping as needed. You’ll feel like you’re working in a studio rather than being herded through a checklist.
Bottom line: this is a good choice on a cloudy day or when you want something indoor that still feels authentically local.
Taking your batik home: what “finished” really means
You do not leave with a blank cloth. You leave with your own batik masterpiece ready to take home, and the studio teaches you enough of the process that you understand what you created.
A few practical tips based on what the studio does:
- Expect the colors and pattern to look best once the entire process is finished, including wax removal and washing steps.
- If you’re worried about damage in transit, you can ask the staff how to handle and pack your finished piece when it’s ready.
- Many students describe picking souvenirs like items from the shop after the workshop (for example, things like a scrunchie or keyring). That part depends on what’s available, but it’s clear the shop is part of the experience.
If you’re thinking about gifting your batik, you’ll feel good doing it. Even when it’s your first attempt, batik has a visual texture and handmade character that looks thoughtful in a way mass-produced souvenirs rarely do.
Price and value: why $8 can still feel like a “real” workshop

The price point is one of the reasons people love this. At about $8 per person for shorter sessions, you’re getting more than a craft kit. You’re paying for materials, guided instruction from a batik teacher, and the time and care needed to produce something you can actually take home.
Here’s what you’re really buying for that money:
- Instructional labor: artists and helpers show you how to do wax and dye steps correctly.
- Materials and tools: you’re not sourcing wax pens, dyes, or fabric on your own.
- A structured process: batik is step-by-step and mistake-sensitive, so guidance matters.
- A finished outcome: you leave with something complete, not a “maybe later” project.
If you upgrade to longer courses, you’re basically buying more time for detail and additional process work. And even without upgrading, many students call it excellent value for what they get.
Just keep one realistic expectation: very detailed work takes time. If your design is complex or you correct mistakes, your session can run longer.
Who should book this batik course, and who might skip it
Book this if:
- You want a hands-on cultural craft in Yogyakarta without needing prior art skills.
- You like structured creativity where staff guide you step-by-step.
- You’re traveling on a day when you want an indoor activity that still feels local and real.
- You’d enjoy learning why batik motifs matter, not just copying a pattern.
You might skip it if:
- You hate waiting. Drying and processing time is part of batik, so you’ll sit for some of the process.
- You want a super-fast activity with minimal mess. This is a workshop, not a two-minute photo op.
- You have very strict time windows. Short options exist, but wax-and-dye timing is never fully instant.
For families, it can work too. One review mentions kids enjoying the experience, which suggests the studio can adapt the pace with support.
Should you book the Yogyakarta Batik Making course at Batik Seno Gallery?
I’d book it if you want a meaningful souvenir that you actually helped create. For a low price, you get guided instruction, a calm studio environment, and a finished piece you can take home.
If you have the flexibility, I’d lean toward a longer session. More time usually means more understanding of the layering process and more space to refine your design. If your schedule is tight, the shorter option still makes sense, as long as you’re okay with learning the principles and getting a smaller, quicker final piece.
Either way, pack your patience, wear your “stain-proof” clothes, and plan to spend a few hours making something with your own hands in the middle of Yogyakarta’s batik world.
FAQ
Do I need experience to take the batik making course?
No experience is needed. The class is taught by a batik guru with step-by-step guidance, and staff support you throughout the process.
What language is the instruction?
The instructor speaks English, and support from the studio team is available during the workshop.
How long does the course take?
Sessions are offered in different lengths, with durations ranging from about 2 to 5 hours (and different options depending on the lesson you choose).
Is the workshop indoors?
Yes. The activity takes place indoors.
What should I wear?
Wear clothes you don’t mind getting stained. This is a wax-and-dye craft, so spills and stains can happen.
What do I take home at the end?
You take home your own finished batik masterpiece. Drinks are included during the workshop. The studio shop is also available to browse before or after your session.